
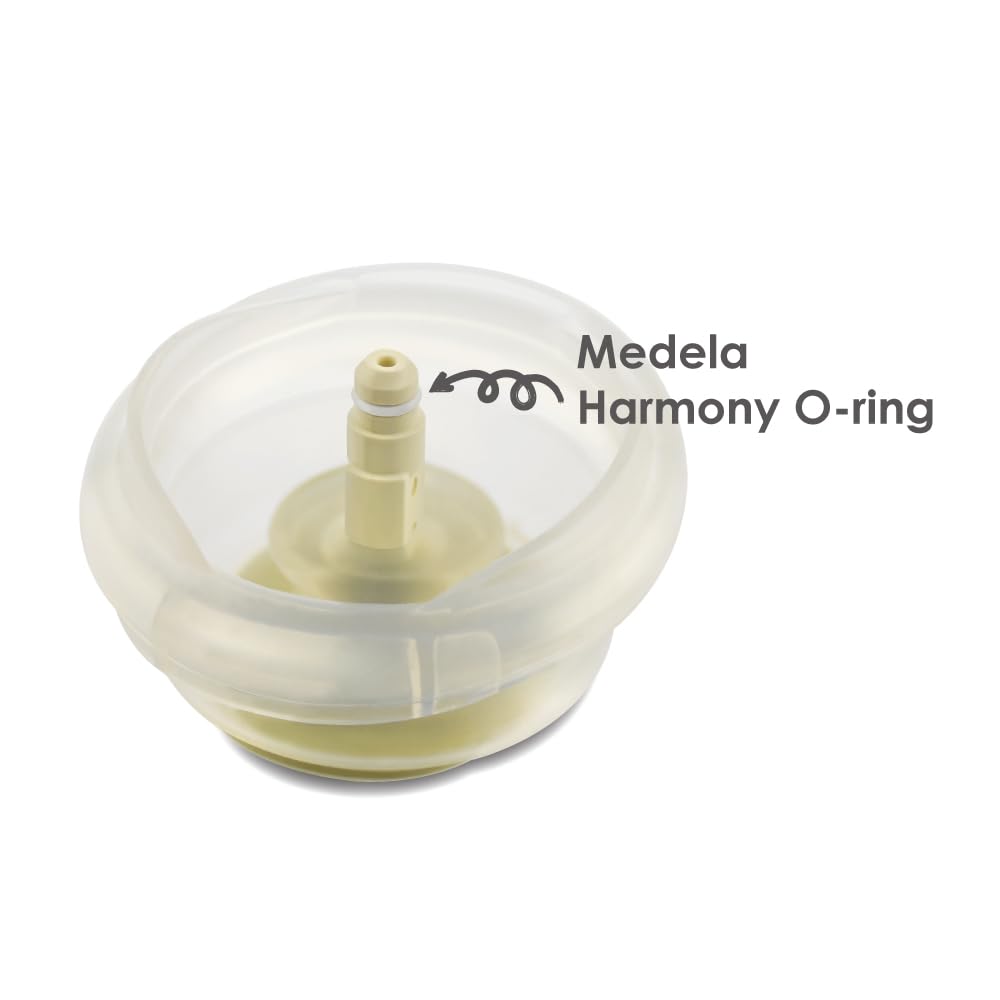
A Medela hand pump that is not suctioning can turn a simple feeding task into a tiring, stressful one. You may feel the handle moving, yet see little or no milk. In many cases, the pump is not broken. A loose part, worn valve, poor seal, or incorrect assembly is often the real cause.
This guide explains why your Medela hand pump may have no suction, how to check it step by step, when to replace parts, and when to seek breastfeeding support. It also covers common Medela Harmony pump problems, low suction after washing, and ways to protect your comfort while troubleshooting.

Start with the fastest suction checks
Before taking the whole pump apart, check the simple things first. A hand pump needs a closed air path and a snug seal around the breast. If air leaks from any point, the handle may feel normal while the pump draws very little.
Wash your hands, place the pump on a clean surface, and inspect each part in good light. Look for a valve that is not seated, a membrane that is folded, or a connector that is not fully attached.

| Quick check | What to look for | What to do |
|---|---|---|
| Breast shield | Gaps around the breast | Reposition and center it |
| Handle | Loose or crooked connection | Push it into place |
| Valve | Tear, split, or poor fit | Replace the valve |
| Membrane | Fold, hole, or wet seal | Dry or replace it |
| Bottle connection | Loose threads | Tighten gently |
| Milk flow | Milk trapped in the valve | Rinse and dry the parts |
A good first test is to assemble the pump without using it. Hold the breast shield against your palm and pull the handle slowly. You should feel a gentle pull on your hand. If you feel no suction at all, the issue is likely in the pump parts or the seal.
If the pump creates suction against your hand but not on your breast, the breast shield position or size may be the problem. Do not keep squeezing harder to make up for a poor seal. That can cause pain and still may not improve milk removal.
Check the Medela hand pump assembly
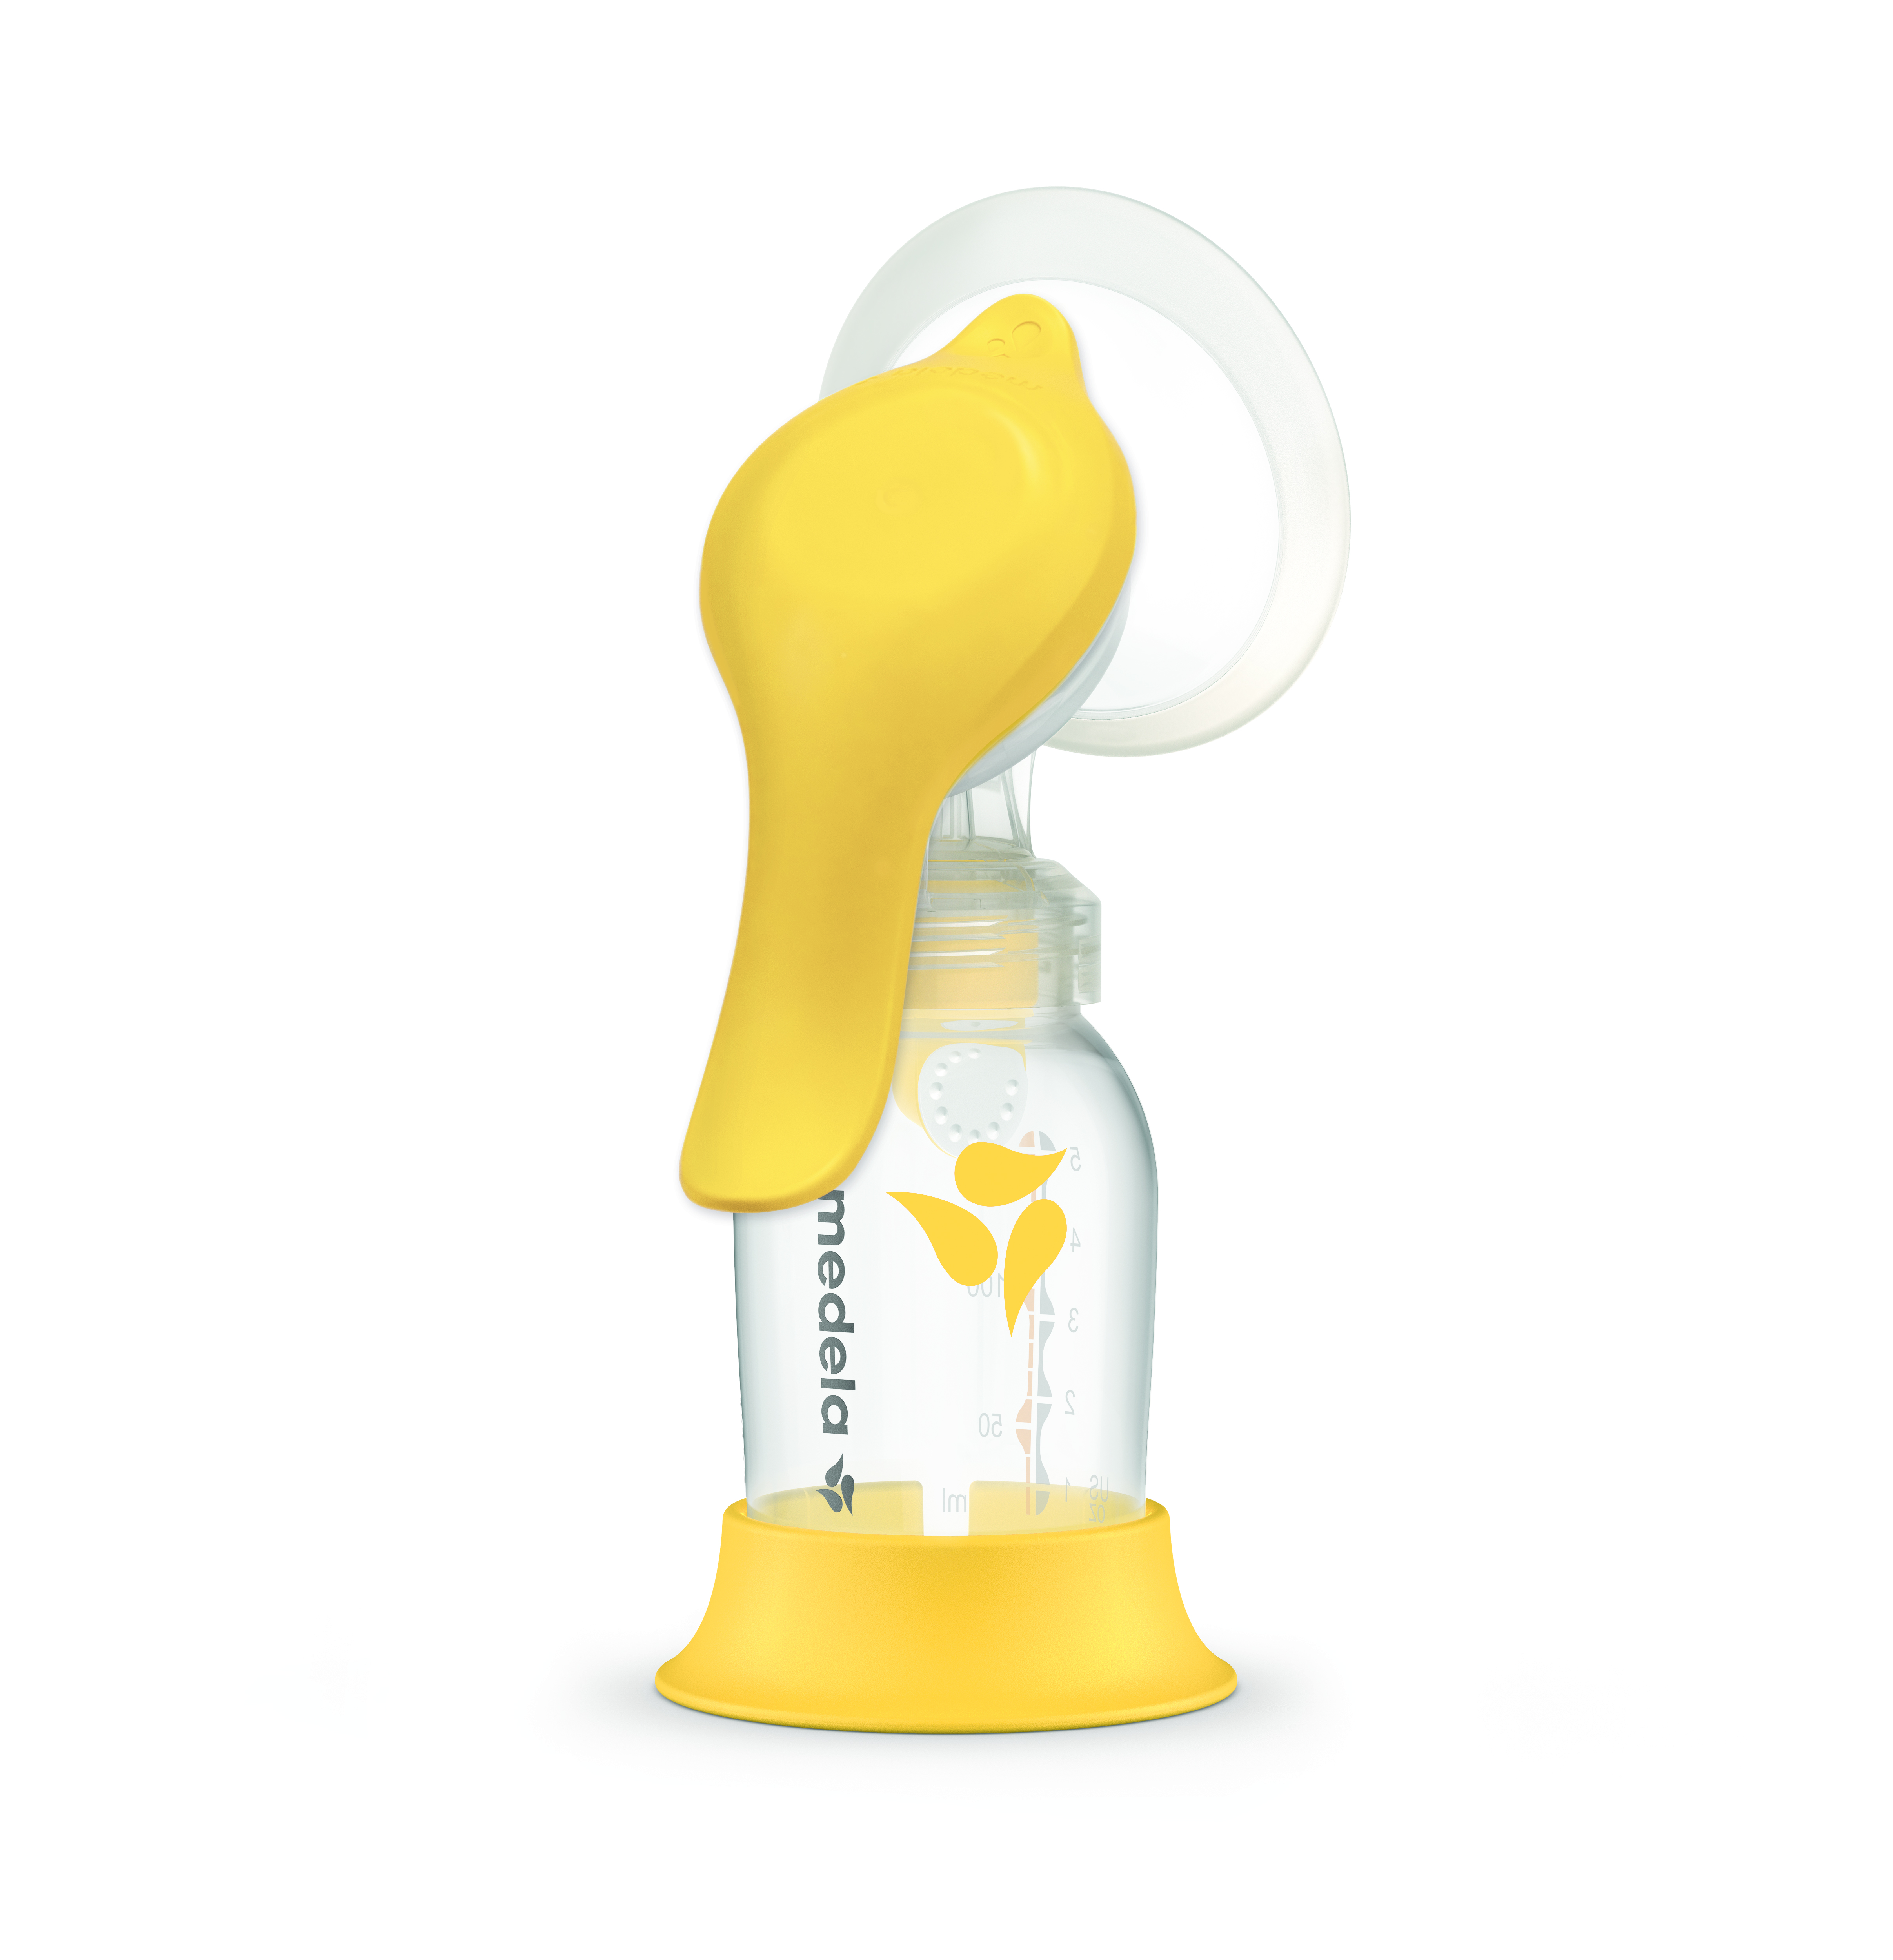
The Medela Harmony hand pump has several small parts that must connect correctly. These usually include the breast shield, connector, valve, membrane, bottle, stem, and handle. One missing or misplaced piece can stop suction.
Start by checking the valve and membrane. The membrane is a thin, flexible piece that opens and closes as you pump. It must sit flat and attach firmly to the valve. A bent edge or small tear can allow air to escape.

Make sure the valve and membrane are fitted correctly
The valve is one of the most common reasons for a Medela hand pump not suctioning. It controls the movement of air and milk. If it is loose, damaged, or not pushed fully into the connector, suction may be weak or absent.
Remove the valve and membrane. Rinse them with clean water if needed, then let them dry fully. Attach the membrane to the valve and check that it lies flat rather than twisted.
| Part | Correct position | Common error |
|---|---|---|
| Membrane | Flat against the valve | Folded edge |
| Valve | Fully attached to connector | Halfway inserted |
| Connector | Firmly joined to shield | Loose connection |
| Handle | Stem aligned with connector | Crooked fit |
Avoid stretching the membrane while cleaning it. This thin part can lose its shape over time. If you see a split, pinhole, cloudy area, or loose edge, replace it rather than trying to repair it.
Confirm that the handle is attached properly
A hand pump handle may look connected even when the stem is not seated correctly. Remove the handle and attach it again. Press it into position without forcing it.
Move the handle slowly through a full pumping motion. It should move smoothly and create resistance. A handle that feels loose, clicks oddly, or swings without resistance may not be engaging the pump mechanism.

If the handle is cracked or the connection point is worn, a replacement handle may be needed. Check the product instructions for the correct Medela part. Different pump models may use different components.
Look for an air leak
A breast pump works by changing air pressure. Even a tiny leak can reduce suction. The leak may come from the breast shield, connector, bottle, valve, or membrane.
When checking for leaks, do not use tape, glue, or other household fixes on parts that touch breast milk. These materials can leave residue and may not be safe for feeding equipment.

| Leak location | Clue you may notice | Helpful action |
|---|---|---|
| Shield edge | Suction breaks when you move | Recenter the shield |
| Connector | Hissing or loose fit | Reattach or replace |
| Bottle threads | Milk or air escapes | Tighten gently |
| Valve | Little milk enters bottle | Inspect for damage |
| Membrane | Handle has no resistance | Fit or replace membrane |
Place the breast shield against your palm again. If the seal is good, the pump should create a gentle pull. Move your hand slightly around the edge. If suction disappears at one point, the shield or connector may not be sealing evenly.
Do not tighten the bottle too much. Over-tightening can distort the threads or connector. Hand-tight is usually enough unless the manufacturer gives different instructions.
Check the breast shield fit
Sometimes the pump is working, but the shield does not fit well. The nipple should move freely in the tunnel during pumping. It should not rub hard against the sides, and too much of the areola should not be pulled inside.
A poor fit can feel like low suction because milk removal becomes less effective. It may also cause nipple pain, swelling, rubbing, or a pinching feeling.

Signs the shield may be too small
You may need a larger shield if the nipple rubs against the tunnel, feels squeezed, or becomes swollen during pumping. A nipple that cannot move freely may not respond well to the pump rhythm.
Signs the shield may be too large
A shield may be too large if a large amount of areola is pulled into the tunnel or if the breast feels pulled hard with each stroke. Excess tissue movement can make pumping uncomfortable and less efficient.

| What you notice | Possible fit issue | What to try |
|---|---|---|
| Nipple rubs on sides | Shield may be too small | Consider another size |
| Much areola enters tunnel | Shield may be too large | Try a smaller size |
| Pain with each stroke | Poor fit or high effort | Stop and reposition |
| Little milk despite suction | Seal or fit issue | Check both shield and parts |
| Nipple looks pale after pumping | Pressure or poor fit | Pause and seek support if it continues |
Breast shape can change during the feeding journey. A size that worked earlier may not feel right now. If you are unsure, a lactation consultant can assess the fit and your pumping position.
Inspect parts after washing or sterilizing
Many parents first notice low suction after cleaning the pump. Small parts can shift, dry in the wrong position, or become damaged by heat. The membrane may also stick to another part or fail to lie flat.
Follow the cleaning instructions for your exact Medela model. Wash parts that contact milk after use. Let them air-dry on a clean surface before assembly.
Do not store wet parts in a closed bag or container. Moisture can make the membrane stick and may allow germs to grow. Do not dry parts with a towel that can leave lint inside the valve.
A cloudy film, sticky surface, or milk residue around the valve can also affect movement. Clean gently and inspect the small openings. Do not poke the valve with a sharp object, as this may enlarge or damage it.
| Cleaning concern | Why it matters | Better approach |
|---|---|---|
| Wet membrane | May not seal well | Air-dry completely |
| Milk in valve | Can block movement | Rinse soon after use |
| Towel lint | May enter small parts | Use a clean drying rack |
| Excess heat | May warp some parts | Follow model instructions |
| Closed damp container | Traps moisture | Store only when dry |
If the pump loses suction only after washing, compare the assembled parts with the instruction manual. The valve and membrane are easy to attach incorrectly because they are small and flexible.
Replace worn Medela pump parts
Pump parts do not last forever. Regular washing, heat, pulling, and daily use can slowly change their shape. A valve may look almost normal but still fail to seal.
The valve and membrane often deserve the first inspection when suction is weak. Many parents replace the whole pump when only one small part has worn out.
Parts that may need replacement
Common replacement parts include:
- Valve and membrane
- Breast shield
- Connector
- Bottle
- Handle
- O-ring or seal, if included with your model
Use parts made for the correct Medela pump. A part that looks similar may not fit or seal correctly. Check the model name and the manufacturer’s instructions before ordering.
| Symptom | Part to inspect first |
|---|---|
| No suction at all | Valve, membrane, handle |
| Suction fades during use | Membrane or connector |
| Milk leaks near bottle | Bottle or connector |
| Pain with good suction | Breast shield fit |
| Pump works only at one angle | Valve or loose connection |
There is no single replacement schedule that fits every family. Heavy daily use may wear parts sooner than occasional use. Replace any part that is cracked, split, misshapen, sticky, or no longer seals.
Do not use a damaged part simply because it still produces some suction. A weak or uneven pump can make sessions longer and more tiring.
Use a better pumping technique
A Medela hand pump needs a steady rhythm, not maximum force. Pressing the handle as hard as possible can cause discomfort and may not remove milk better. Gentle, repeated strokes usually give you more control.
Begin with faster, lighter strokes for a short time. This may help encourage milk flow. Once milk begins to flow, use a slower rhythm with a deeper but comfortable stroke.
Keep your shoulders relaxed. Sit upright and support the bottle so its weight does not pull on the breast shield. Center the nipple in the tunnel before you begin.
Warmth, calm breathing, and gentle breast massage may help some people relax. Stress, pain, and rushing can make let-down feel harder. These steps do not guarantee more milk, but they can make pumping more comfortable.
| Technique issue | What may happen | Adjustment |
|---|---|---|
| Pumping too hard | Pain or swelling | Use gentler strokes |
| Shield off-center | Air leak | Recenter before pumping |
| Bottle unsupported | Shield shifts | Hold the bottle steady |
| Fast, uneven rhythm | Poor milk flow | Use a steady pattern |
| Long painful session | Nipple irritation | Stop and reassess |
Stop if pumping causes sharp pain, bleeding, or worsening nipple damage. A small amount of discomfort from a new sensation can happen, but pumping should not feel harmful.
What to do if the pump has suction but no milk
A pump can have suction and still collect little milk. This does not always mean the pump is faulty. Milk flow depends on let-down, breast fullness, timing, comfort, and the pump’s fit.
First, check whether milk is entering the bottle or collecting in the connector. Milk trapped near the valve can make the pump seem blocked. Clean the parts and try again when they are dry.
If the pump works on one breast but not the other, the issue may be breast fullness, let-down, or positioning rather than the pump. Some parents also find that one breast responds better to a hand pump.
Try these practical steps:
- Check the valve and membrane.
- Recenter the shield.
- Massage the breast gently.
- Start with light, quick strokes.
- Switch to slower strokes when milk begins to flow.
- Pause if the nipple becomes painful.
- Check the parts again if milk enters the connector.
Pumping output is not always a direct measure of milk supply. A baby may remove milk more effectively than a pump, and some bodies respond better to one pump style than another.
If you are pumping to maintain supply, replace a missed feeding or provide milk for a baby who cannot nurse, ask a lactation professional for personal guidance. A pediatrician or feeding specialist can help if your baby is not gaining weight, has fewer wet diapers, or seems unwell.
Avoid common Medela hand pump mistakes
Several small mistakes can make a working pump seem broken. The most common is assuming that more pressure will fix poor suction. In reality, the pump needs a sealed system and the right fit.
Another mistake is replacing the bottle before checking the valve. The bottle may be fine while the membrane is worn or incorrectly attached. Checking parts in order can save money and time.
| Common mistake | Why it causes trouble | Better approach |
|---|---|---|
| Forcing the handle | May damage the stem | Use smooth strokes |
| Ignoring nipple pain | Can worsen irritation | Stop and check fit |
| Using mixed model parts | May not seal | Match parts to model |
| Storing parts while damp | Affects hygiene and seal | Dry fully first |
| Over-tightening the bottle | May distort the fit | Tighten by hand only |
| Poking the valve | Can cause a larger hole | Replace the damaged part |
Myth: stronger suction always means better pumping
Stronger suction is not automatically better. Excess pressure can cause pain, swelling, or skin irritation. The best setting is one that feels comfortable and supports milk removal.
Myth: a few drops means the pump is useless
A low amount in one session does not prove that the pump has failed. Timing, stress, recent feeding, and let-down can all affect output. Always check the equipment, but do not judge the entire pump from one short session.
When to stop troubleshooting
A few simple checks are reasonable at home. However, continued pain or concerns about your baby’s intake deserve professional help. Equipment troubleshooting should not delay care.
Stop using the pump and seek advice if you notice blood that continues, severe nipple damage, intense breast pain, or signs of infection such as a hot, red area with fever. Contact a health professional promptly if you feel seriously unwell.
Ask a lactation consultant, midwife, nurse, or doctor for help when:
- Your baby is not gaining weight as expected.
- Your baby has fewer wet diapers than usual.
- Pumping remains painful after checking the fit.
- You cannot maintain milk removal because the pump is not working.
- You have repeated blocked areas or breast pain.
- You are unsure whether a part is safe to use.
If your baby is very sleepy, difficult to wake for feeds, has signs of dehydration, or is not feeding well, contact your pediatrician. A faulty pump is frustrating, but your baby’s feeding and health come first.
A simple five-minute troubleshooting routine
When you need a quick plan, use this order. It helps you find the most likely problem without taking unnecessary steps.
Begin with the breast shield and work toward the bottle. Keep the parts on a clean towel so small pieces do not roll away.
- Wash your hands.
- Remove and inspect the valve and membrane.
- Make sure the membrane is flat and undamaged.
- Reattach the valve firmly.
- Check the handle and connector.
- Tighten the bottle gently.
- Test suction against your palm.
- Reposition the shield on the breast.
- Use slow, comfortable strokes.
- Replace damaged parts before the next session.
| If this happens | Most useful next step |
|---|---|
| No palm suction | Reassemble or replace parts |
| Palm suction but no breast suction | Reposition shield |
| Suction drops during pumping | Inspect membrane |
| Milk leaks from the joint | Check connector and bottle |
| Pain continues | Stop and seek feeding support |
This routine can often identify a loose connection or worn membrane. If the pump still does not work after the parts are correctly assembled, contact Medela support or the retailer where you bought it.
Frequently asked questions
Why is my Medela Harmony hand pump not suctioning?
The most common causes are a loose valve, damaged membrane, poor breast shield seal, or incorrect assembly. Test the pump against your palm, then inspect the valve and membrane. Replace any part that is torn, stretched, or misshapen.
Why does my Medela hand pump lose suction while pumping?
A membrane may be shifting, the shield may be losing its seal, or the connector may be loose. Milk or moisture around the valve can also affect suction. Stop, dry the parts, reassemble them, and check the shield position.
Can washing damage a Medela hand pump?
Cleaning itself should not damage the pump when you follow the instructions. Problems may occur if parts are exposed to unsuitable heat, stored while wet, or handled roughly. Small flexible parts can also be assembled incorrectly after washing.
How often should I replace the Medela valve and membrane?
Replace them when they become damaged, loose, cloudy, sticky, or unable to maintain suction. Frequent users may notice wear sooner than occasional users. Follow the instructions for your model and inspect the parts regularly.
Why does my pump work on my hand but not on my breast?
This often points to a positioning or breast shield issue. Center the nipple in the tunnel and make sure the shield sits flat against the breast. If the fit remains uncomfortable, ask a lactation consultant to assess the size and position.
Is it normal for a hand pump to make noise?
Some sound is normal as the handle moves and air pressure changes. A new hissing sound, clicking part, or sudden loss of resistance may suggest an air leak or damaged component. Inspect the valve, membrane, connector, and handle.
Can I use a Medela hand pump with different brand parts?
It is safest to use parts designed for your exact Medela model. Different parts may look compatible but fail to seal or may not be intended for use together. Check the model instructions before mixing components.
Should I keep pumping if it hurts?
No. Stop if you have sharp pain, bleeding, or worsening nipple damage. Recheck the shield fit and suction level, then seek advice from a lactation professional or health provider if pain continues.
Conclusion
When a Medela hand pump is not suctioning, start with the valve, membrane, breast shield seal, and handle connection. These small parts control the air pressure that makes the pump work. A clean, dry, correctly assembled pump often solves the problem.
Use gentle strokes, keep the shield centered, and replace damaged parts instead of forcing the handle or using homemade repairs. If suction remains poor, pumping hurts, or your baby is not feeding well, contact Medela support and a qualified healthcare professional for help.